Building Inspectors Brace for Anticipated El Niño Flooding

Meteorologists forecast a massive El Niño weather system will hit California later this year, extending through the Southwest to the Carolinas and parts of the East Coast.
This may seem like welcome news for California, especially as it suffers through its worst drought in a millennium, but state emergency officials worry that heavy rains will do more than relieve drought-stricken areas. It will also bring floods, mudslides, and debris flows from forests stripped bare from drought-fueled blazes.
And while El Niño has yet to have an effect on the Carolinas, exceptional flooding already ravaged South Carolina the first week of October. Considered one of the worst flooding events in U.S. history and partially blamed on tropical moisture from Hurricane Joaquin, it left more than half of the state underwater.
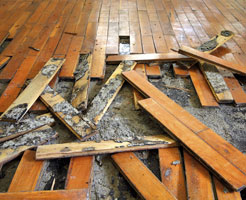
Flood Damage
The damage floods cause can be devastating. Television news reports and newspaper photographs depict stark images of flood destruction – destroyed homes and buildings, flooded cars, damaged possessions and decimated roadways. Meanwhile, essential services such as power, water, sewage, and gas services may not be working for days or, in some cases, even weeks.
And when flood waters recede, residents face still more dangers – floodwaters contaminated with sewage and chemicals as well as gas leaks and live power lines. Homeowners and commercial property owners also face the stress and expense of disaster recovery. And those expenses can go even higher when insurance policies do not include flood protection.
Increased Workload for Building Inspectors?
Should a powerful El Niño lead to widespread flooding, professional building inspectors may be called out in greater numbers to assess the amount of damage. With flooding, as with any natural disaster, there are health risks that threaten not only property owners but inspectors as well.
In this special report, we’ll take a look at some of the inherent risks inspectors may face, and the precautions they must take to prevent bodily harm. We’ll also look at an essential tool all inspectors must have on hand during their inspection of flooded properties.
Water Source Identification
There are three categories of flood water building inspectors should be aware of:
Category 1 (Clean Water)
Category 1 water is caused by broken water lines, malfunctioning appliances, broken toilet tanks (supply water), tub or sink overflows, snow, rainwater, and melting ice. This type of flooding poses no health risks because it normally contains no measurable contaminants. But that may change quickly. Clean water can pick up contaminants as it moves through structures and therefore advances to Category 2 water.
Category 2 (Gray Water)
Category 2 water comes from dishwashers, washing machines, sinks, showers, broken aquariums, and waterbeds. It can be hazardous and pose health risks because it can contain significant levels of chemical and biological contaminants. Exposed to the open environment, gray water can progress to Category 3 water in only 48 hours as biological activity begins.
Category 3 (Black Water)
Category 3 water can come from any type of sewage, toilet backflows, rising water from rivers or streams, and ground surface water. Black-water poses the greatest health risks because it can contain sewage as well as other forms of bio-effluence, environmental contaminants, pesticides, heavy metals, toxic organic and inorganic chemicals, and more. More than 120 different viruses, parasitic agents (such as Giardia and Cryptosporidium), and bacterial organisms (such as Salmonella, Escherichia coli, and Enterobacter) can be found in Category 3 Black Water.
When cleared to enter a home or building that’s been flooded with gray or black water, avoid skin contact with anything that has been touched by the contaminated water. Keep all cuts and sores clean and covered, and all soiled objects away from your mouth, eyes, and nose.
If not handled properly, exposure to gray and black water can cause allergic reactions and infectious diseases, including gastroenteritis, respiratory and eye infections, and inflammation of the liver.
Inspections after Flooding
Floods can cause hidden dangers that make them unsafe. Inspectors, therefore, should exercise extreme caution when inspecting flood-damaged buildings.
Hazards can occur from one or more risks:
- Electric shock hazards
- Toxic sludge and materials containing waterborne bacteria
- Fire and explosions caused by natural gas or bottled gas
- Structural collapse
- Trip-and-fall injuries
- Septic tank collapse
- Extensive toxic mold colonies
When Conducting an Inspection
Attire
- Wear rubber gloves and goggles to protect your hands and eyes from splashing water as well as moldy or contaminated materials. Wash your hands thoroughly with a disinfectant soap if you’ve handled contaminated articles with bare hands.
- Wear water-resistant clothing, preferably coveralls, to protect your legs from sharp objects as well as contact with mold and other contaminants.
- Wear sturdy, protective footwear with proper treads. The most common injury after a disaster is cut feet. Floors may be littered with broken bottles, nails, and other dangerous debris.
- In the event that you detect extensive mold, have an HEPA-rated respirator handy. If you are asthmatic or susceptible to mold exposure, leave the building.
Look out for Wildlife
- Watch for possible wildlife, especially poisonous snakes, which may have been washed into the building during the flood. Flood waters attract wildlife such as rats, raccoons, even dogs and cats that are likely to be frightened and defensive. Use a stick to poke through debris to check for dangerous critters.
Be Wary of Insects
- Use an effective insect repellent on exposed skin areas and vigilantly reapply often. Flooding can attract mosquitoes, fleas, and ticks which can carry spread disease, such as encephalitis and West Nile virus. Repellents containing DEET (Diethyltoluamide) should have concentrations less than 20%.
- Fire ants are another hazard, especially in the South. When fire ant colonies are flooded out, the entire colony — numbering in the thousands — will ball together and float on the surface of the water. Most times, this floating mass of ants looks like just another piece of flotsam or junk floating on the water. But if you bump into this floating colony, the ants will instantly seek higher ground (you). And when they discover their resting place is alive, they can deliver hundreds of potentially fatal stings.
Before Entering
- Inspect the building exterior for downed power lines and gas leaks. Gas leaks will smell like rotten eggs. If you suspect a gas leak, contact the utility company immediately and do not attempt to find the leak or enter the building.
- Inspect the foundation for signs of cracks and other structural damage, such as leaning, bulging, or bowing foundations that may render the building uninhabitable or in danger of sudden collapse.
Inside a Building

- Don’t work alone, if possible. If you get injured, it might take a long time before you’re helped.
- If you do work alone, be sure to have a cell phone handy to call for help, if needed.
- Check to see if the door sticks at the top. If so, this could be a sign of a ceiling ready to collapse. Open the door, then stand outside the doorway to see if there’s any falling debris.
- Check for potential collapse inside a building by examining doors, walls, windows, floors, and staircases. Inspect for loose plaster, drywall, and ceilings that may collapse.
- Use caution while inspecting crawlspaces. You may encounter a significant mold presence, sewage, asbestos, chemicals, rodents, and the risk of structural collapse.
- Inspect for sewage and water supply line damage. If you suspect sewage lines have been damaged, avoid using the toilets and instruct the client to call a plumber. If water pipes are damaged, instruct the client to contact the water utility company and avoid operating the tap.
Mold Warning
- If extensive mold is visible, wear an HEPA-rated respirator during the initial walk-through. Persons who are asthmatic, or otherwise at particular risk, should stay out of the building.
Gas Leaks & Explosion Hazards
- Check for gas leaks inside the home. If you smell gas or hear a blowing or hissing noise, open a window and immediately leave the building. If possible, turn off the gas at the outside main valve. If not, call the gas company.
- Once the gas is turned off for whatever reason, a professional must turn it back on. Never use an open flame inside of a flood-damaged building unless you know the gas has been turned off and the building is ventilated.
- To inspect for damage, use a battery-powered lantern, flashlight, or the flashlight app on your cell phone, not an open flame or electrical fixture in the building.
- Inspect for fire hazards, such as broken or leaking gas lines, flooded electrical circuits and submerged furnaces and electrical appliances. Flammable and explosive materials may travel from upstream. Ironically, fire is the most frequent hazard in homes following floods.
- Inspect for electrical system damage, such as broken or frayed wires, and burned insulation. If you need to get to a fuse box or circuit breaker, don’t step in water. Call an electrician first for advice. Electrical equipment should be inspected by a qualified professional and dried before returning to service.
- Do not use appliances that may have gotten wet unless you know they’ve been dismantled, cleaned, and dried.
- Report broken electric, gas, sewer, or water lines to authorities so the utilities can be turned off.
Moisture Detection
Determining the extent of moisture intrusion and migration requires the use of moisture detection equipment. One of the best tools for detecting hidden excess moisture either inside or outside of a building is the moisture meter.
Using a moisture meter enables inspectors to provide property owners a more valuable and thorough inspection. It also gives those inspectors who use them a competitive advantage.
Moisture Meter: A Valuable Inspection Tool
Many professional home and building inspectors use moisture meters because of their ability to quickly and accurately detect areas of moisture intrusion – especially areas that are hidden and not readily apparent during a visual inspection.
For instance, excess moisture may be hidden within a wall cavity, exterior wall sheathing, or behind a ceramic tile wall covering. A moisture meter can help find those areas with elevated moisture levels, thereby preventing potentially dangerous or damaging moisture situations.
Great for Detecting Mold
Moisture meters also help inspectors identify the extent of excess moisture within a property. Building materials that get sufficiently wet – including drywall, plaster, wood, tile, siding, and roofing – are at risk for mold, rot, or decay within a short period of time.
Take mold, for example. It will grow on surfaces that have a moisture content (MC) of 20% or more, though vapor pressure and other factors can affect this value. In no time, mold spores can be released throughout the living area.
Of course, it’s not the job of an inspector to look for the presence of mold spores. But he/she can, however, scan for those pockets of moisture that are likely to breed mold. Once detected, it is up to the property owner to eliminate the source of moisture and any mold that might develop from it. In this way, the inspector can add value to his/her service by offering important advice.
Inspectors can use a moisture meter to detect possible mold colonies in such places as:
- Damp attics and basements
- Insulation material between walls
- Wallboard located in damp locations (Corners are particularly susceptible because of inadequate air circulation caused by the placement of furniture or other objects.)
- Open interior spaces of cavity walls (They can harbor mold due to roof and mechanical system leaks that soak these interior surfaces.)
- Beneath wood flooring, subfloors, carpets, and tile
- Ceiling tiles (Ceiling tiles are porous and easily absorb moisture. Leaks and condensation from mechanical system piping or roof leaks can lead to mold growth.)
- Ductwork (Moisture can condense and accumulate in duct lining material or moisture can accumulate in attics because of ductwork leaks.)
Moisture Meters Also Detect Locations Where Pest Infestations Are Likely
Although moisture meters are not used by home inspectors to find pest infestations, they can be used to detect moist areas that potentially could attract pests.
It doesn’t take much moisture to attract pests. For instance, carpenter ants and subterranean termites can thrive in wood as low as 15% MC. Some species of beetle and borer insects, however, can thrive inside wood with only 12% MC.
Areas where pest infestations commonly originate include:
- Plumbing within walls
- Damp basements and attics
- Materials wet from a leaky roof
- Cracked pipelines or poorly installed drain systems
NOTE: We’re not stating that home or building inspectors should search for pests. In fact, most states which license pest inspectors also prohibit others from inspecting for pests. A home inspector can forfeit his home inspection license for doing unlicensed termite inspections.
Additionally, home inspectors are protected by state laws from inspecting for damage hidden inside walls.
Should home inspectors either find evidence of or suspect the possibility of a pest infestation during the inspection, they should inform the property owner so that a licensed pest inspector can be called in.
Moisture Meters Are Valuable for Another Reason
Moisture meter readings provide inspectors with clear, exact, and easy-to-share data with property owners.
For example, Wagner moisture meters come with a Press and Hold feature. This allows the inspector to take an MC reading in dark or hard-to-reach areas and then display the reading to the property owner once the meter is removed. Or, the data can be stored and retrieved later since some meters have data collection capabilities.
Providing this kind of information to property owners documents an inspector’s report of moisture intrusion. It can also enhance an inspector’s reputation – and ultimately – their profitability.
Types of Moisture Meters
Moisture meters enable inspectors to detect moisture levels in most building materials, such as wood, stucco, drywall, plaster, tile, shingles, linoleum, roofing, and more. They are useful tools to have during home inspections because they can determine the moisture properties of inaccessible or hard-to-reach locations without causing them any damage.
There are two types of moisture meters available for use in the home or building inspections: pin-type meters and pinless meters. Each type of meter has a specific function. Some inspectors use both types of meter, depending on the particular application.
Pin-Type Moisture Meters
How They Work
Pin-type meters are equipped with two metal pins that must penetrate the wood or material’s surface in order to take a moisture reading. Once the pins are in, the inspector turns the meter on.
This causes an electrical current to pass between the pins and the meter displays a value on-screen for the amount of resistance there was to the electric current between the two pins.
In other words, pin-type meters work on a resistance principle that measures the effect of moisture on an electric current passed between the two pins. Because water is a good conductor of electricity and wood is a poor conductor, the meter can tell how much water is in the wood by how much current travels between the pins. The less resistance there is, the more water is present in the material being measured.
Advantages of Pin-Type Moisture Meters
Because pin-type meters take readings between the two pins, they offer slightly more variability in reading depths than a pinless meter. In other words, pin-type meters that use longer pins with insulated shafts offer the user an advantage of testing at different depths in the wood or material. NOTE: The MC reading is always taken at the depth the pins are driven into an object.
And, as long as the two pins penetrate the material, pin-type meters can take readings regardless of the material’s shape, size, or degree of roughness. Typically, pin-type meters are used to test for moisture on the surface of building materials, such as stucco, drywall, plaster, or wood.
pin-type meters can measure the MC of a material’s surface, or at incremental depths. Manufacturers of pin-type meters normally have probes of varying lengths and designs in order to extend their reach.
For instance, hammer probes can be driven deep into wood or other materials, while other probes can be inserted into pre-drilled holes in masonry, or pushed through insulation. Also, long-pin type moisture meters are capable of detecting moisture in the wall cavity insulation that did not show up in surface tests using a pinless meter.
Disadvantages of Pin-Type Moisture Meters
The advantage of testing at different depths is negated if the insulation surrounding the meter’s pins is peeling or has come completely off. Inspectors who use pin-type meters must check the pin insulation frequently.
As the pins are driven into structural materials, such as plywood and hardwood, the insulation will begin to wear. If the meter displays elevated numbers, the insulation has been compromised and the pin(s) must be replaced. If not replaced, MC readings will be inaccurate.
Uninsulated pins measure the wettest layer of wood they come in contact with. So if the wood or material is located where it can absorb a lot of moisture, it may have higher MC on the surface than the core. In that event, uninsulated pins will only take a reading of the wetter outer surface no matter how deep the pins penetrate.
Most pin-type meters come with a variety of accessories and attachments designed for various building materials and construction methods. These attachments, especially hammer probes, suffer from abuse and can easily give false readings due to broken electrical connections.
One must also consider that pin-type meters measure moisture in only a relatively small area surrounding the pin insertion. Therefore, intermittent wet spots in the wood or material may be missed by pin-type meters.
Because the pins put unsightly holes on the surface of the wood or material with each test, inspectors should exercise care when using. For instance, this is not a problem for 2x4s or material hidden from sight, but it can be for wood floors, walls, ceilings, or other areas where the holes would be noticeable. The holes may also provide an avenue for moisture to enter deep into the wood or material best tested, and possibly even insects.
Another concern is the possibility of broken pins or inaccurate readings because of improperly driven pins. This can happen because of the force necessary to insert a pin meter into wood. The longer the pins are, the greater the risk of breakage during use. If replacement pins are not on hand, the meter becomes unusable.
Pin-type meters also are more sensitive to temperature changes than pinless meters. Because of that, pin-type meters should always come with temperature correction charts for wood measurements.
Inspectors who work in coastal regions that are flooded should be aware that pin-type meters won’t work at all if the material being tested was exposed to saltwater or brackish water. The salt prevents them from working properly.
Pinless Moisture Meters
How They Work
Pinless moisture meters use radio frequency signals to detect and measure MC beneath the surface of a material. At the bottom of the meter is a sensor plate, which is held tightly against the surface of the material being tested.
The plate projects electromagnetic waves (radio waves) that penetrate the material. The meter can detect a change in the electromagnetic field caused by moisture and the material. It then converts the change to an MC reading.
Wagner Meters, for instance, uses radio waves to determine the presence of excess moisture. Their meters detect the amplitude of the waves, which is diminished when they come in contact with water.
Wagner’s meters also take a three-dimensional average of the moisture in wood or other materials. This decreases the likelihood that intermittent wet spots will be missed, as is the case with pin-type meters.
Advantages of Pinless Meters
Because pinless moisture meters use radio frequency signals that cover a wider area than pin-type meters, inspectors can scan large areas quickly and easily. This helps them instantly identify the general location of moisture for further inspection. And it allows for a more rapid home or building inspection.
Because pinless meters have no pins, they do not damage wood or other surfaces as do pin-type meters. They can also be slid rapidly along building surfaces, making it easy to scan large areas for moisture. But when using a pinless meter, one must apply adequate pressure to get a correct reading.
Pinless meters also are less prone to breakage during normal use, but a person must verify calibration (as both styles must) in order to provide accurate MC readings.
Disadvantages of Pinless Meters
It may be hard to get an accurate reading if the wood or material is warped or very rough. In that case, a few passes with a block plane may create a flat spot to take the reading. Pinless meters may also be susceptible to scratches or damage to the sensing pad.
Unlike pin-type meters which provide readings at greater depth, pinless meters generally operate at two standard reading depths: ¼-inch and ¾-inch below the surface. There is anecdotal evidence, however, that Wagner meters can detect moisture at a greater depth than ¾ inches.
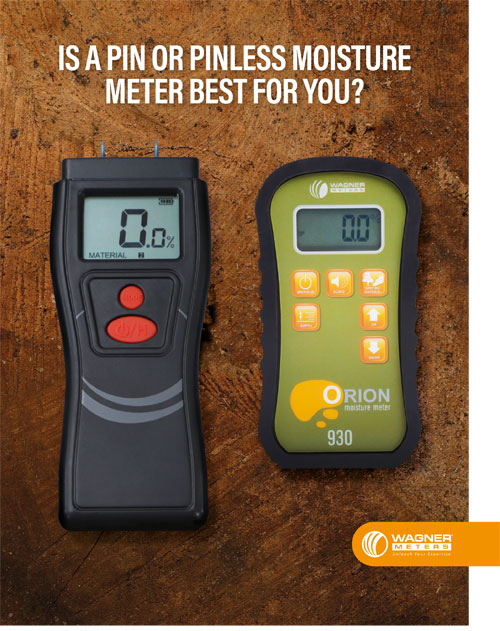
Free Download – Is a Pin or Pinless Moisture Meter Best For You?
Wagner Meters Orion Line
Wagner Meters Orion line of moisture meters are ideal for building or home inspections and is designed to provide comparative, relative MC readings for a wide range of common building materials, such as:
- Wood
- Synthetic stucco
- Plaster
- Drywall
- Ceramic tile
- Insulation materials
- Shingles
- Linoleum
- Concrete slabs and foundation walls
- Roofing
- Fiberglass
- And more . . .

For inspectors and mold remediation specialists who want more high-performance moisture detection equipment at their fingertips, Wagner offers two inspection kits: the Building Inspector’s Basic Inspection Kit and the Building Inspector’s Ultimate Inspection Kit.
The Building Inspector’s Basic Inspection Kit includes:
- Orion® 950 Smart Bluetooth® Moisture Meter
- TH-200 Thermo-Hygrometer
- Infrared Thermometer
- Foam-lined Carrying Case
The Building Inspector’s Ultimate Inspection Kit contains everything in the Basic Kit plus the Rapid RH® Completer 5.0 Starter Kit for concrete moisture testing.
Maximizing Any Moisture Meter’s Use
As with any tool, how you use it and maintain it will determine its accuracy and overall performance. Here are nine tips on how to maximize a moisture meter’s performance – whether it’s a pin-type or pinless meter.
- Be aware of metal. Moisture meters are sensitive to metal, so they should be kept away from anything conductive. Thus, taking a reading near any metal object such as nails, staples, or metal studs renders the moisture meter ineffective, resulting in a false reading. See the False Moisture Meter Readings section below for more details.
- Handle with care. Many moisture meters are calibrated at the factory and will probably never need recalibrating. But if the meter is dropped, it may need recalibrating. Some manufacturers require the meter be returned for recalibration. Others, like Wagner Meters, offer a “calibration verification block” that can be purchased and available for quick and convenient calibration checks.
- Keep fresh batteries on hand. Moisture meters do not draw much power, so the batteries will have a long life. It is still a good idea to keep spare batteries with the meter. A quick switch of batteries on the job site will prevent any loss of time.
- Don’t forget the manual. The meter’s manual includes not only instructions of how to use the meter but often mentions other valuable information. For instance, the Wagner manual has information on the material settings for various construction materials and a caution about false readings from metal (see tip #1 above).
- Wipe off standing water. Before taking wood moisture readings, wipe off any standing or visible water and allow the surface to dry for 60 seconds or more. Standing or visible water usually results in inaccurate readings, regardless of the meter type. For example, pin-type meters with non-insulated pins give highly exaggerated readings when the wood surface is wet. Also, be aware that if water soaks into the wood, it will give a higher MC reading.
- Consider the subfloor. When measuring MC levels in installed flooring, the meter will probably pick up moisture in the subfloor. If the subfloor is made of wood products, this probably won’t skew the readings, but concrete will give a higher reading.
- Make good contact. Pinless meters require about three pounds of pressure to obtain a good reading. Pin-type meters must be pressed firmly into the wood until the pins reach the designated reading depth. Care must be taken when pressing the pins into hardwood as they tend to break.
- Document everything. Inspectors should record all readings using either a spreadsheet or with photos of the meter’s readings.
- Follow the grain. When used on wood, pin-type meters work better when they are placed in the direction of the grain.
False Moisture Meter Readings
If metal is present within the penetrating range of the meter, it will alter wave characteristics in ways similar to water. The meter will report levels of moisture that are higher than the actual level of the material if it detects a copper wire, a metal pipe, or some other metallic substance.
If an inspector suspects that the meter is sensing metal, s/he can monitor the readings as s/he moves the meter in a straight line away from the elevated reading area – horizontally, then vertically. As the meter is moved this way, notice if the meter is responding to what may be a piece of metal or wood stud rather than an area of elevated moisture. The straight outline of a copper wire or metal pipe can usually be traced in this fashion.
Hidden metal objects used in construction can also cause problems. Common examples are steel frames that join drywall at corners (bead and trim), fasteners, flashing, and metal channels.
Metal at depths greater than 1 to 1 ½ inches from the surface being scanned won’t be a problem. As the meter is scanned across studs, the readings will be elevated due to the higher density of the stud vs. the void and the insulation space.
These guidelines also apply when measuring MC of flooring material over concrete or plywood. The meter may respond to these types of materials as it would to an increase in MC.
The Indispensable Moisture Meter
While it appears that El Niño peaked earlier this winter and will continue to weaken over the next few months, it is still expected to influence the weather across the United States. Meteorologists say it will be wetter through May in California, most of the Great Basin and Desert Southwest, Lower Mississippi Valley, the Southeast, and most of the East Coast.
This increases the likelihood many homes and buildings may be flooded this spring. If this occurs, home and building inspections also will increase to determine the extent of damage and whether or not properties are habitable.
 While commercial building or home inspectors have an array of tools they can use on the job, perhaps the most critical tool is the moisture meter. Moisture-related problems annually cost billions of dollars in damage and can jeopardize the structural integrity of a home or building.
And, in those cases where moisture intrusion leads to mold outbreaks, serious health issues also can occur.
Therefore, inspectors who use moisture meters covered in this special report stand to offer greater value and benefit to their customers. It also enables them to enhance their professional reputation and profitability – as well as gain a competitive advantage over those inspectors who fail to use these devices.
As Sales Manager for Wagner Meters, Ron has more than 35 years of experience with instrumentation and measurement systems in different industries. In previous positions, he has served as Regional Sales Manager, Product and Projects Manager, and Sales Manager for manufacturers involved in measurement instrumentation.
Last updated on May 4th, 2021